Beverage Tote
An unforgettable way to say thank you
 An unforgettable way to say thank you
By Rob Brown
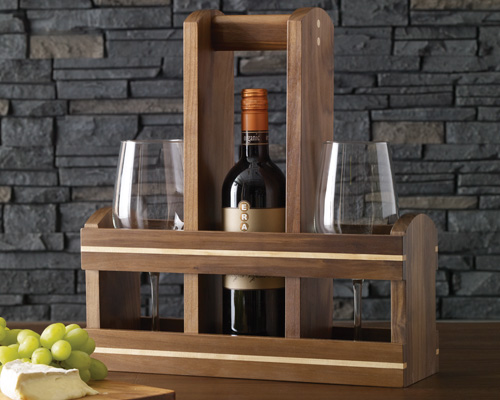
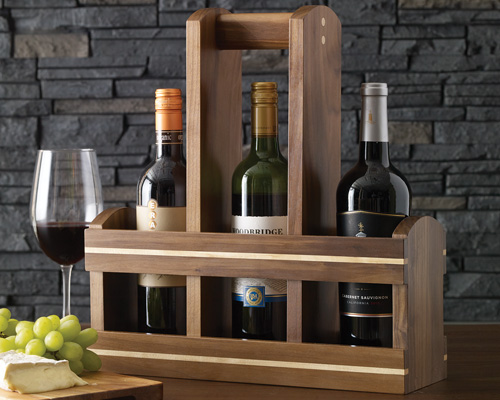
Raise a glass to your favourite hostess with this DIY tote - a welcome gift to give or receive all year round. Modify to carry whiskey and tumblers, or champagne and stemware to ring in the new year.
What You'll Need
Tools
 Materials
Rob Brown designs and builds custom furniture and is editor of Canadian Woodworking and Home Improvement magazine.
www.canadianwoodworking.com

- table saw 1346-636
- jointer
- planer 1260-219
- mitre saw 1347-117
- bandsaw 1345-341
- sander 1262-895
- cordless drill 1239-404
- plug cutter
- clamps 1022-480
- sanding blocks 1061-282
Your appreciation lives on when the tote doubles as a display,
long after the event is over!
 Materials
 - solid black walnut approx. 84" long x 5" wide x 1" thick
- contrasting solid maple
- walnut and maple plugs
- #8 x 11/2" long screws
- wood glue 2020-067
- urethane finish 1877-525
- clear vinyl pads 2350-609
Here's How to Make the Beverage Tote
- Breakout two blanks, 31" long x 41/2" wide, and dress them to final thickness.
- Rip both blanks to 4" wide.
- Cut uprights to finished length from one of the blanks.
- Cut the bottom and sides to final length from the other blank.
- Draw and machine arcs on ends of uprights and sides.
- Sand the arcs smooth. (photo 1)
- Drill pilot holes to secure ends to bottom, and uprights to bottom. (photo 2)
- Glue up rail blanks with contrasting wood. (photo 3)
- When dry, dress rails to final thickness and dimension, and sand their faces.
- Sand the inner faces of the ends, bottom and uprights.
- Screw ends to bottom, then glue one lower rail to the sub-assembly.
- When dry, cut a spacer to help position the upper rail, then glue and clamp the upper rail in place. (photo 4)
- When dry, glue and screw uprights in place, ensuring the uprights are square to the bottom. (photo 5)
- Glue the opposite lower rail in place, then use the spacer to position and glue the upper rail in place.
- Breakout the handle blank to finished width and thickness, but ensure it's at least 12" long.
- Use a 1/2" diameter round over bit in your router table to round over all four corners of the handle.
- Cut the handle so it will fit between the two uprights, then screw it in place. (photo 6)
- Plug the handle screw holes with contrasting wood plugs, and the other screw holes with non-contrasting wood plugs.
- Sand the plugs flush, ease all sharp edges, and ensure all visible faces are sanded smooth.
- Apply a finish.
- Add a self-adhesive, non-skid pad to each corner of the tote.
A Smooth Arc After the arc is cut, use a sanding block to smooth and fair the surface. |  |
| Pilot Holes Once the locations of the uprights have been marked on the underside of the bottom, drill pilot holes through the bottom and into the ends of the uprights to ensure proper placement, and so the parts don't split. | |
Contrasting Species Glue up lengths of contrasting material for the rails. | |
Simple Spacer Once the lower rail has been glued in place, position a spacer against it to locate the upper rail, then glue and clamp the upper rail in place. | |
| Add the Uprights Using glue, clamps and screws, fix the uprights in place. Ensure they're perpendicular to the bottom panel. | |
| Secure the Handle With the handle shaped and cut to length, drill some pilot holes and secure it in place. Add contrasting plugs to cover the countersunk holes. |
Rob Brown designs and builds custom furniture and is editor of Canadian Woodworking and Home Improvement magazine.
www.canadianwoodworking.com


