Central Library
Corral the chaos into one special place where a child can practice their ABCs and keep their favourite reading buddies close at hand.
 What You'll Need
Tools:
- band saw
- jointer
- planer 1332-533
- sander 1262-171
- drill
- counter sink drill bit 1227-513
- table saw 1346-636
- sanding block
- carpentry compass 1115-626
- clamps 1022-480
Materials
- lumber 2 x 8 x 8' long (2)
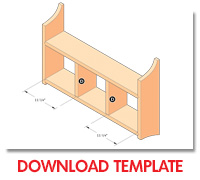 lumber 1 x 6 x 4' long (1)
 - glue 2020-155
- #8 x 2 " long screws (8)
- Minwax Gel Stain 1876-651(shown: Mahogany)
- polyurethane 1878-212
- BeautiTone Designer Series matte paint(shown: Sesame Street Grouchland Sky)
- 3/4" x 3/4" L-brackets (4)
- masking tape 1670-891
- tape measure 1048-967
Here's How:
- Break out material 1" longer than finished size.
- Plane to 11/8" thick.
- Cut gables to finished size.
- Cut dados across the gables. (photo 1)
- Band saw arcs in gables. (photo 2)
- Cut shelves to size and machine tenons on their ends. (photo 3)
- Sand and assemble shelves and gables.
- Cut front to size with arcs on both ends. (photo 4)
- Lay front piece in place, and with a pencil trace where it will be located on the cabinet and where the cabinet will be located on the back of the front piece.
- Apply masking tape to the edges of the cabinet and the backside of the front piece where they will be glued. (photo 5)
- Cut two dividers to finished size.
- Temporarily install dividers then remove them. (photo 6)
- Sand all parts.
- Apply Minwax® Gel Stain to cabinet. (photo 7)
- Apply protective finish to cabinet.
- Re-install the two dividers.
- Apply three coats of paint to the front piece.
- Apply glue, and clamp the front piece to the cabinet. (photo 8)
- Install L-brackets to the back of the cabinet, aligned with your wall studs.
| Strong Joinery Once you've determined the location for the dados in the gables, cut them on your table saw. | 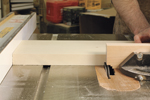 |
| Cut Curves Lay out flowing arcs on the gable ends,and cut smooth with a band saw, jig saw, scroll saw, or coping saw. | 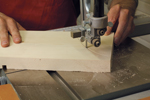 |
| Simple Math Rather than work the shelf length out in your head, place the gables back to back. With the mark of the overall width of the cabinet lined up with the inside edge of the dado, check the reading on your tape measure to obtain the overall length of the shelves. | 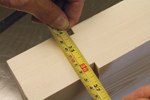 |
| Smooth Arcs After locating your centre point, draw an arc to mark the end of the front piece, and then cut it to shape. | 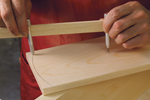 |
| No Finish Apply tape to the area where the front piece will be glued to the cabinet to ensure the finish will not affect the glue. Apply tape to where the front piece mates with the cabinet edge, as well. | 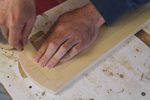 |
| Helpful Spacers With spacers clamped in place you can easily position the dividers and drill screw holes. | 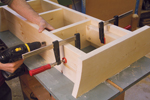 |
| Even Colour A gel stain is much less likely to create a blotchy finish, as it sits on top of the wood, rather than penetrates into it. Applying a finish is much easier to do with the dividers removed. | 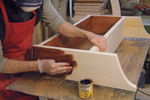 |
| Final Assembly With the cabinet and front piece complete, it's time to glue and clamp them together. Use cauls so the clamps don't damage the finished surface of the wood, and don't tighten the clamps more than necessary. | 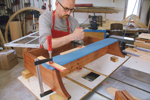 |
Rob Brown designs and builds custom furniture, and is editor of Canadian Woodworking and Home Improvement magazine.
www.canadianwoodworking.com


