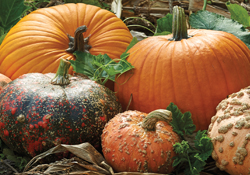
Gourd-eous Projects
Gourds grow in many wonderful, natural shapes and sizes that ignite your imagination to create delightful decorative objects.
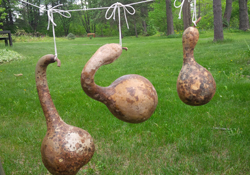
 Curing Ornamental Gourds
Curing or drying ornamental gourds requires time. The outside of the gourd must dry completely, and then it will take several more months for the inside to dry and cure.
- Clean the surface of the gourds with soapy water and allow them to air dry. Wipe them with rubbing alcohol to ensure the surface dries completely.
- Place in a well-ventilated area away from direct sunlight for about one week. The skin will begin to harden and change colour. After a week, the outside of the gourd should be well dried.
- Move the gourds to a well-ventilated, dark area where they can remain for at least six months. Spread them in a single layer and be sure none of the gourds are touching each other. Allow air to flow under the gourds by placing them on a screen or vented surface. It may be easier to hang larger gourds for drying.
- Check your gourds every day or two and discard any that begin to decay, shrivel, or get soft. If mould appears, wipe it off with a dry cl
 oth or one dipped in bleach. If the gourd is still hard, it should be fine. Drying gourds is not a pretty process!
 - Turn them every couple of weeks to dry evenly and prevent rotting.
- When the gourds become light in weight, hard solid, and you can hear the seeds rattling inside when you shake them, they are ready for use.
- Use steel wool to remove any remaining dirt or mould. A quick dunk in a bath of bleach water finishes the process. Let dry completely.
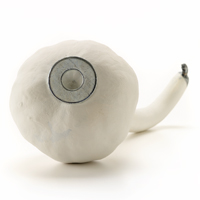
Birdhouse
What You'll Need
- hole saw 1267-550
- drill
- 1/16" bit 1241-016
- polyurethane
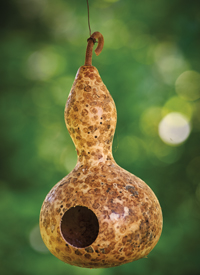
- BeautiTone enamel spray paint
- eye screw 2557-404
- twine or wire to hang 5462-184
- Use a 1.5″ hole saw to carefully cut the circle for the birdhouse opening. Clean out the dried seeds inside the gourd. A few 1/16" holes drilled in the bottom of the gourd will provide drainage and help keep the gourd dry.
- To hang, drill a small pilot hole in the remaining stem and put in an eye screw. Use twine or wire for hanging.
- Apply polyurethane if leaving the gourd a natural colour. If using spray paint, avoid the bright colours. Browns and greens are a better choice.
Hang your birdhouse outdoors in early spring before the birds arrive.
Attach it to a post or tree with plenty of space between houses.
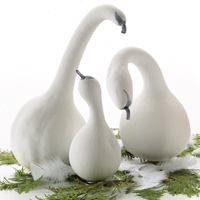
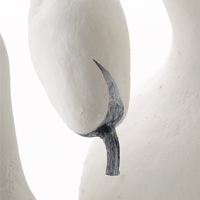
Swans
What You'll Need
- dried gourds
- BeautiTone flat white spray enamel 1823-009
- black craft paint
- large washer 2190-628
- hot glue gun and glue sticks 2047-144, 2047-243
Here's How
Hang the gourds to spray with BeautiTone flat white enamel spray paint. Use a small amount of black paint for face details. Attach a large washer with hot glue to the bottom of the gourds so they sit in place.
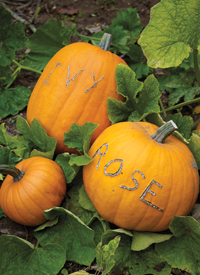 Pumpkin Patch Fairy
Invite the Pumpkin Patch Fairy to your garden to customize pumpkins with family names. Children will squeal with delight when they discover a pumpkin with their name on it, and will be intrigued to watch it grow.
Here's How
Once the pumpkin fruits have set but are still the size of a small melon, gently carve the name in the pumpkin's skin with a screwdriver, nail, or pocket knife. The cuts should just break the skin and not cut into the flesh. Gently scrape away the outer skin, which will naturally heal over in time, not harming the pumpkin.