Outdoor beverage bar and nesting tables
There is nothing more convenient than opening a cooler and serving your guests nice, cold beverages when you're entertaining on the deck or patio.
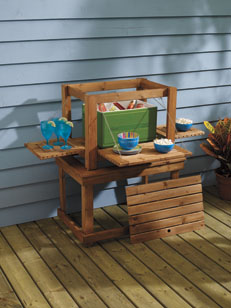
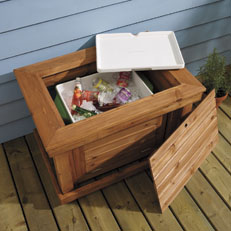
There is nothing more convenient than opening a cooler and serving your guests nice, cold beverages when you're entertaining on the deck or patio. I was thinking of this simple gesture when an idea came to mind: what if I made something decorative and functional that could house my cooler, double as a mobile beverage bar and convert to a side table or bench when not in use?

Often inspiration for a project design comes from my surroundings. In this case, I was inspired by the concept of nesting tables. I could make one table slide inside a slightly larger one to use as a bench, or stack them on top of each other to get the height needed for a stand-up beverage bar.
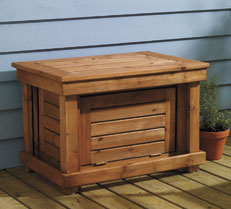
Next, I needed to create a work surface to prepare drinks. My solution: add a fold-down tray on the front and two ends of the smaller table. This would make the table look like a deck box when the trays are folded up, which I thought would add charm to the overall appearance of the project.
Now, with my design clear in my mind, I was ready to start building. The measurement of the smaller table was determined by the size of my cooler, adding a little extra room for easy removal. I ripped 5/4 cedar decking in half and routed all cut edges to the radius on the boards. This created the crate design and allowed for pre-drilling and the use of 31/2" deck screws on the breadboard style ends of the fold-down shelves.

To support the shelves in the open position, I used a pair of brass-plated butt hinges and a length of chain. To keep the shelves closed when not in use, simple hook and eye locks were installed on the inside of the small table.
I used 2" deck screws to assemble my project to ensure everything was fitting properly. Then, I took it all apart, sanded all the pieces and reassembled using exterior wood glue with the screws.
Finally, with my nesting tables built, all that was left to do was protect the wood from the elements. To keep my project looking great for many years to come, I brushed on one thin coat of Thompson's® WaterSeal® Advance Nutmeg Brown to protect against water and ultraviolet damage.

That's the Finish!
Ralph Swan
Ralph Swan is a wood care expert for Minwax® and a frequent contributor to Home at Home magazine.
What you'll need
• 100' of 5/4 cedar decking 2805-615/617/619/621/623
• exterior glue 2020-869
• brass hinges (3 pair) 2411-054
• hook & eye
• Thompson's WaterSeal Advance Nutmeg Brown 1886-730
• stain brush set 1612-201


