You've got mail!
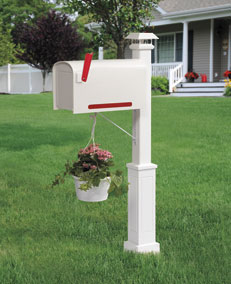
Enhance the curb appeal of your home and make a great first impression with this streetside post-mounted mailbox.
Enhance the curb appeal of your home and make a great first impression with this streetside post-mounted mailbox. The attractive style and detailed design is built to slip over a ground post for easy installation. Add a super heavy-duty mailbox, and top it off with a solar light cap to make every mail delivery special.
 What you'll need
Tools
- tape measure 1048-967
- table saw
- planer 1332-533
- router 1258-524
- 1/4" straight bit
- clamps 1022-479
- screwdriver set
- chisel 1020-317
Materials
- 4 x 4 cedar (8')
- 1/4 sheet of exterior plywood (2' x 4')
- 1" x 1" trim (2')
- masking tape
- large bracket 2310-109
- small bracket 2682-134
- stainless steel tap screws 2165-294
- construction adhesive 2030-583
- sandpaper
- BeautiTone Acryl-lok Primer
- BeautiTone Designer Series Exterior Suede Paint
- paint brush
- solar cap
- mailbox
- hanging basket 5058-046
- container soil
Here's How
- Cut the 4 x 4 post 42" long.
- Cut the four plywood panels to fit around the lower section of the 4 x 4 post, and mitre their edges so they fit nicely around the post.
- Mark a line 12" above the bottom of the post.
- Bring edges of mitres together and run tape across the four plywood parts. (Photo 1)
- Apply adhesive to the mitres and post, and then wrap the plywood panels around the post, keeping top of panels in line with pencil mark.
- Mark where the grooves will be machined into the plywood panels - 3/4" away from sides, 2" away from top, and 8" away from bottom.
- With a 1/4" straight bit in your router, and an edge guide attached to your router, cut the 1/8" deep, vertical grooves. (Photo 2)
- Use a shop-made square as a guide to cut the horizontal grooves.
- Clean up corners with a chisel. (Photo 3)
- Breakout 1" x 1" trim, then add a 22.5° angle on front edge with a table saw or hand plane. (Photo 4)
- Mitre and install the four trim pieces with adhesive and nails.
- Rip base trim to 5" wide with a 22.5° angle on the top edge.
- Mitre the four pieces to fit around the base and install them.
- Sand piece and break all sharp edges.
- Apply two coats of BeautiTone Acryl-lok primer, then apply at least two coats of BeautiTone Designer Series Exterior Suede paint to all surfaces.
- Install the large metal bracket so the upper surface is 42" above the ground.
- Cut 6" x 16" plywood mailbox base and screw it to the top of the large bracket.
- Use a small bracket to fix the back of the plywood base to the 4 x 4 post then attach the mailbox directly to the plywood base.
- Add the solar cap.
- Install a 4 x 4 post in the ground so it protrudes just over 12" above ground.
- Slide the mailbox post over the ground post.
| Tape is Great Once the plywood panels are cut to size and mitred, line them up side-by-side and run tape across their joints. The panels can be glued then wrapped around the bottom of the post. | 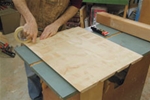 |
| Machine Grooves With a shop-made square clamped to the base, rout the horizontal grooves. | 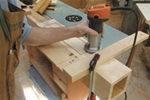 |
| Square It Up A sharp chisel will clean the corners up nicely. | 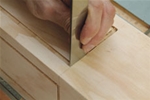 |
| Nice Transition Once the four trim pieces are cut, apply adhesive and secure them with a few nails. | 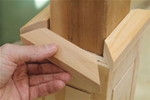 |
The proper placement and maintenance of rural mailboxes ensures continued safe delivery of mail by Canada Post. Please consult with your local post office to ensure that all mailbox specifications and road safety criteria are met before installing a rural box. Your Local Postal Official can answer any questions you have about rural mail delivery, or visit www.canadapost.ca.
Rob Brown designs and builds custom furniture, and is editor of Canadian Woodworking and Home Improvement magazine.


